
One of the first impressions visitors get from your site is most definitely the menu, whether they view it on desktop, mobile, or other devices. For that reason, it is crucially important to keep the menu within sight of your audience once they are on the site.
Back in the day, that was quite a challenging task, but fortunately, today, some plugins will easily guide you through the process of keeping your menu floating all the time. It brings a lot of benefits, especially in terms of raising the levels of user experience because visitors want to have the main sections easily accessible even if they scroll and stroll around your page.
Table of Contents
WP Sticky Plugin
Our WP Sticky is one of the best solutions available today. Sticky navigation menus that remain visible on the screen as visitors scroll down the site seem to be trendy, and that is what makes WP Sticky so popular and widely spread today.
WP Sticky is a great free tool that will let you make any menu element you have on the site sticky. It will make the top menu constantly visible, which contributes to user experience since menus usually contain the links to the most valuable sections on the site.
It is widely used to keep the desired menus on the top of the page, so-called floating menus. Any element you wish can get sticky with WP Sticky: header, widgets, logo, calls to action, etc. All you have to do is add the element to the plugin, and the plugin will automatically make it a sticky element.
There is an even simpler way to select the elements that will be transformed into sticky or floating elements. WP Sticky PRO comes with a feature called Visual Picker, which allows absolute beginners and novices to create sticky elements on their WordPress sites.
This feature comes in great for those users who have little or no knowledge about HTML elements and coding. PRO version of the plugin allows users to click on elements they want to make sticky, in this case, the menu (see the image below).
As you can see, the menu that contains the main sections of the site stays on the top even though the user scrolls down the page to the bottom.
How To Add Sticky Elements With WP Sticky
The very first step is finding, installing, and activating the plugin, and those who want to activate white label mode from the very beginning should look for a License tab inside Settings and then click on “Enable White Label Mode Button.” Once you do, adding sticky elements has never been easier.
Inside the Settings, there will be an option “Add New Sticky Element” that is located in the upper left corner. All you have to do is select the desired element, and the plugin will turn it sticky. Although the editor offers you Advanced options besides the Basic, don’t think that the Basics will take you far.
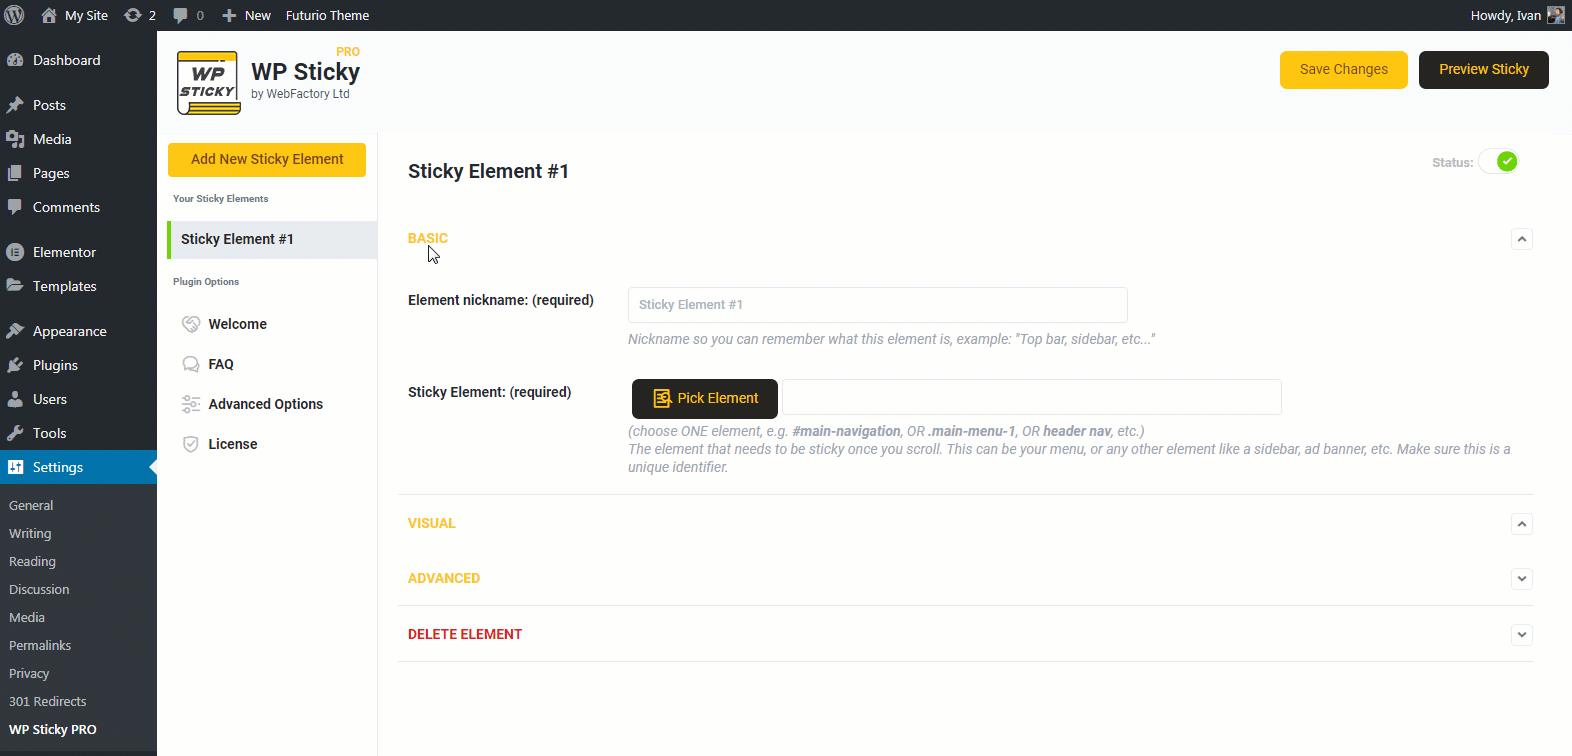
To pick an element, simply click “Pick Element,” and the visual picker will get activated. Yellow lines around elements are there to let you know which one is about to get sticky if you wish. The basic option does offer you certain aspects of editing the new sticky elements.
Advanced Settings, on the other hand, offer more additional rules you can set for your sticky elements. For example, you can set a rule not to stick if the screen is smaller or larger than a certain size or to push-up element, which means to move back the sticky element to its default opposition once the user scrolls to it.
Perhaps you want to prefer where the sticky elements can stay, so the plugin lets you choose the specific pages where the rules will or will not apply. In case you happen to not need sticky elements anymore, one click on the “Delete” button, and the sticky element is gone.
Briefly, if you need further customization of chosen sticky elements, then the Advanced Settings are right for you. PRO version brings very handy features.
There’s also a pretty handy feature here. It allows the user to add a space between the top of the page and the sticky element. To avoid the sticky part appearing too clunky and near the top while scrolling. Not something you’d typically even think about, but we’re glad it’s there.
Conclusion
As you have learned throughout the article, sticky navigation offers more to the user experience, and WP Sticky is a very powerful plugin. It does take care of floating navigation and is characterized as super-easy to use with various customization options.
Plugins like simply this can not be too expensive because the features such as WP Sticky brings further motivate us to recommend this plugin to any type of website owner that wants to involve in a sticky menu.